A window may have modern glazing and a frame that looks perfectly sound, yet still fail at the narrow line where the frame meets the wall. External and internal sealant joints work every day: they accommodate small movements while coping with sun, rain, wind and temperature changes. Once they lose adhesion or flexibility, water and draughts can find discreet routes indoors.
In Lisbon, where dry hot summers are followed by periods of heavy rain, waiting for a visible stain before checking these details is a common mistake. The IPMA climate normals for Lisbon provide useful context for inspecting openings before wetter weather arrives. This guide explains what to look for, which home checks are sensible and when a professional assessment is the safer option.
What a window sealant joint is meant to protect
A sealant joint is not simply a cosmetic finish. It is the transition between different materials: plaster, stone, tile or façade render on one side; aluminium, PVC, timber or steel framing on the other. Those materials expand, contract and vibrate differently. A properly specified and installed flexible seal helps limit rainwater entry, reduces air leakage and protects the perimeter detail from premature deterioration.
It is helpful to distinguish three parts that are often treated as one:
- the external seal, which acts as the first barrier against wind-driven rain;
- the insulating or backing material within the gap, which should not be left exposed;
- the internal finish, which affects air-tightness, comfort and appearance.
A crack in the indoor bead does not automatically prove that rain is entering from outdoors. It does, however, justify checking the full detail. Equally, painting over an opening may hide it for a while but does not restore elasticity or adhesion.
If the work includes replacing frames, changing the appearance of the façade, using scaffolding or occupying the pavement, check the applicable requirements first. Lisbon City Council notes that some conservation works may be exempt from prior planning control in defined circumstances, while listed buildings, buildings under classification or protection areas have specific conditions; public-space occupation for exempt works may also require a notice or permit.
Warning signs that should not be ignored
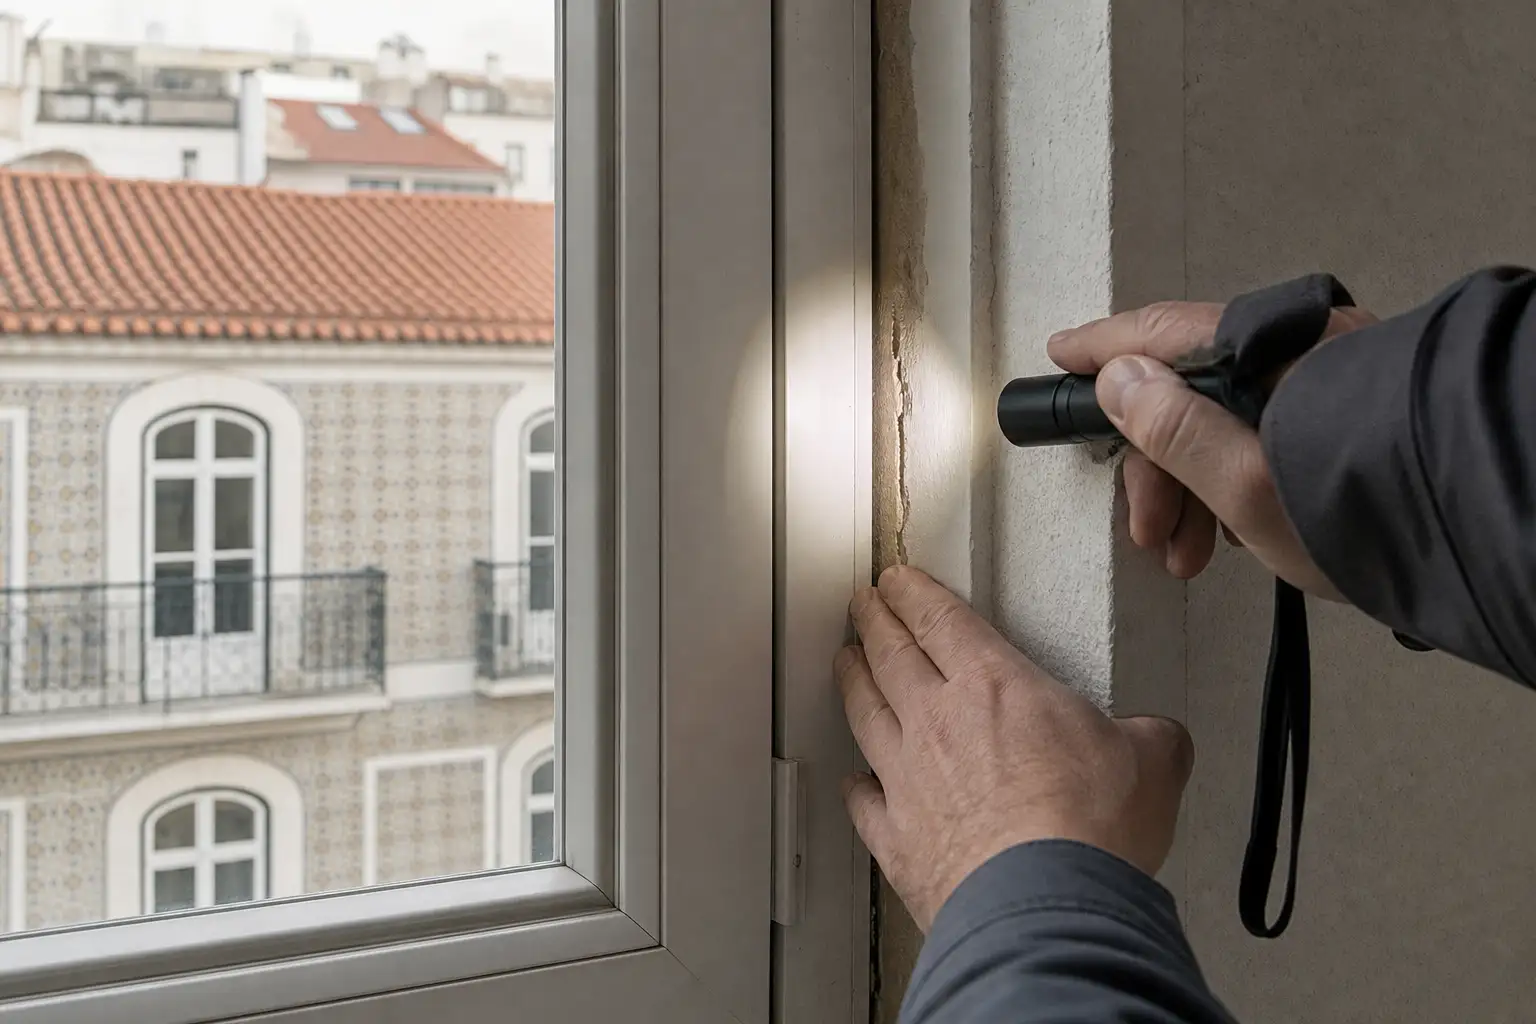
The clearest sign is a joint that has detached at the edges or has developed a continuous gap between frame and wall. Also look for hard, brittle, crumbling or blistered areas, as well as missing material. A sound joint accommodates movement; an aged one can become rigid and split when the opening expands in warmer conditions.
Indoors, inspect upper corners for staining, peeling paint, damp skirting boards or a persistent musty smell. Do not immediately assume that the window itself is the source. Water may enter higher up the façade, through a poorly drained sill, a crack in the render or a roof defect. Noting when a mark appears — after rain with wind, only in the morning, or throughout the year — helps separate rainwater ingress from condensation or moisture travelling from another location.
A window that has begun to admit dust, traffic noise or a noticeable draught also deserves attention. Not all air leakage comes through the perimeter joint: sash gaskets, hardware adjustment and roller-shutter boxes can contribute. For the wider decision, see our guide to replacing windows during a Lisbon renovation.
Simple checks that will not damage the opening
Start with a visual inspection on a dry day, using a torch and close-up photographs. Follow the entire external perimeter, including corners, the junction with the sill and areas hidden by blinds, railings or plants. Inside, move your hand slowly around the frame on a windy day; a local cold-air sensation can indicate a weakness, although it is not a substitute for a technical diagnosis.
A second cautious check is to close the window on a strip of paper. If the paper pulls out without resistance in several places, first consider sash adjustment and the window’s own gaskets. Do not pierce the joint, force blades between frame and wall, or use high-pressure water. These actions can cause damage or drive water into spaces it would not normally reach.
After ordinary rainfall, compare photographs and look for new changes. Where access is safe, check that drainage openings designed into the frame remain clear. Never seal them with mastic, tape or paint. A window needs to direct any water reaching its drainage chambers back outside.
When uncertainty remains, a professional inspection can combine external observation, sill checks, controlled water testing and review of the internal finish. It is especially worthwhile for high façades, wind-exposed openings and buildings with fragile external finishes.
When a local repair is enough — and when renewal is better
A local repair can be suitable when the failure is small, the remaining joint is still flexible and well bonded, and the cause is clear. Even then, the new product will only perform on a clean, dry, compatible and stable base. Applying sealant over dust, loose paint, degraded silicone or trapped moisture usually shortens the life of the repair.
Removing and remaking a whole section is generally more reliable where cracking is repeated, detachment is widespread, mould contamination is present, patches have accumulated or joint thickness varies greatly. The work should respect the joint’s width and depth, use backing material where appropriate and specify a sealant suited to exposure, substrates and expected movement. A joint that is too deep or bonded on three sides may fail earlier.
Frame selection and perimeter detailing belong to a broader comfort and efficiency decision. ADENE highlights initiatives related to sustainable construction and window-frame solutions, a useful reminder that performance depends not only on glass but also on installation, finishing details and maintenance.
If the wall is damp behind the finish, do not close the issue with a new bead before finding the source and allowing suitable drying. Otherwise, the stain may return elsewhere and the final repair will cost more.
Common mistakes and a realistic maintenance routine
The most common mistake is to treat sealant as a purely decorative job. Another is to choose a product only by colour, without confirming adhesion to the substrate or resistance to UV exposure. Other frequent problems include blocking frame drainage holes, making moving joints rigid, or layering incompatible products on top of each other.
A simple routine can prevent unpleasant surprises:
- visually inspect joints at least once a year;
- repeat the check before the rainy season and after wind-driven storms;
- remove accumulated dirt without aggressive abrasives;
- keep nearby sills, drainage outlets and gutters clear;
- photograph suspicious areas so changes can be compared;
- request a diagnosis when staining, detachment or water entry appears.
Preventive maintenance is not the same as improvised repair. In apartment buildings, a problem originating in the façade, roof or another shared element may require notice to and coordination with the condominium. If water has already affected plaster, timber, electrical systems or insulation, stopping the moisture route must come before repairing finishes.
To review the complete opening detail, also read our article on window-sill slope, drainage and protection against leaks. A well-made sealant joint works best when the surrounding detail guides water safely outwards.
Have you noticed staining near windows, draughts or deteriorated external joints? Obra Lisboa can help assess the source of the problem and plan a repair compatible with the frame, façade and building.
Editorial image; it does not depict an Obra Lisboa project.

Obra Lisboa